I played around with some new techniques this week using the new Embossing Paste and let me tell you it was a lot of fun! I used the stamp set A Little Wild and the thinlits from Up & Away. They can be found on page 108 and 216 of the new 2017-2018 Annual Catalog. If you are interested in receiving a catalog please let me know. It is also available here at MyStampin' Up! page.
The background on the Soft Sky CS was made using the new Embossing Paste and the cloud mask from Pattern Party Decorative Masks. I just love how it turned out and how you can control the texture of the clouds by using more or less embossing paste and using the Palette Knives. It's hard to tell in the photo but I added some Dazzling Diamonds Glitter to give the clouds a little sparkle. To do this sprinkle the glitter on while the Embossing Paste was still wet. I used the thinlets from the Up & Away die set to make the hot air balloon, the background for the balloon and the basket the adorable little lion is sitting in. I did not stamp a sentiment on the card yet,I'll do that when I am ready to send it out. This card can be used for all kinds of occasions such as a baby shower, childs birthday, get well or just because.
Paper & Measurements
Whisper White CS- 4 ¼ x 11, 4 1/4 x 4 1/4 scrap piece for the lion and the hot air balloon
Soft Sky CS- 4 x 5 1/4
Crumb Cake CS- 3 x 3
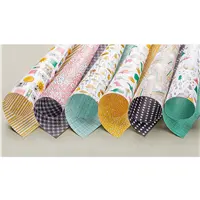
Color Theory DSP Paper Stack- I used the blue ombre sheet
Ink
Early Espresso Classic Stampin' Pad
Neutrals Stampin' Write Markers- Early Espresso and Crumb Cake
Brights Stampin' Write Markers- Pumpkin Pie
Regals Stampin' Write Markers- Crushed Curry
2017-2019 In Color Stampin' Write Markers- PowderPink
Stamps
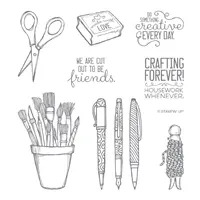
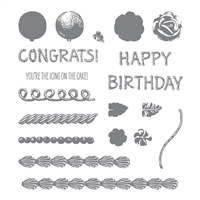
A Little Wild Clear-Mount Bundle
Up & Away Thinlits Dies
Tools & Accessories
Big Shot,
Simply Scored,
Bone Folder,
Stampin’ Trimmer,
Stampin’ Dimensionals,
Snail Adhesive,
Clear Block D,
Fine-Tip Glue Pen,
Stampin' Scrub,
Stampin' Mist,
Embossing Paste,
Pattern Party Decorative Masks,
Palette Knives,
Very Vanilla Solid Baker's Twine,
Dazzling Diamonds Stampin' Glitter,
Mini Glue Dots.
Instructions
Please read through the instructions before beginning project.
1. Score along the 11” side at 5 ½". Fold and burnish with the Bone Folder.
2. Lay the cloud mask over the Soft Sky CS and apply Embossing Paste using the Palette Knives. After applying a thin layer I went back and used the Palette Knife and tapped on the clouds giving them a little "puff". Remove the mask and sprinkle the Dazzling Diamonds glitter on the clouds. Allow to dry- I left mine overnight.
3. On the scrap Whisper White CS, stamp the front image of the lion using Early Espresso Classic Stampin' Pad.
4. Using the Big Shot cut out the intricate large hot air balloon from the Up & Away Thinlit die set and cut out the lion using the corresponding thinlit.
5. Select the pattern paper you would like to use from the Color Theory DSP- I used the blue paint chip ombre paper. Cut out the balloon pieces starting at the darkest color down to the lightest with the Up & Away thinlit dies. Using the 2nd and the 3rd dies from the top of the large balloon cut out the pieces for the balloon basket from the Crumb Cake CS.
6. Adhere the DSP Color Theory paper that was cut to the back of the Whisper White hot air balloon using the Fine-Tip Glue Pen then trim off the basket.
7. With the Stampin' Write markers color in the lion using Crumb Cake for the body, Crushed Curry for the mane and tip of the tail. Using the Pumpkin Pie highlight the mane by coloring around the outside. Use the Powder Pink Stampin' Write Marker to color in the nose, ears and cheeks. Fussy cut the rest of the lion to remove white outline then using the Early Espresso Stampin' Write Marker to go around the outline of the cut giving it a clean finished look.
8. Assemble the card by adhering the Soft Sky background to the Whisper White card base. Apply a little Snail to the back of the lions legs and attach to the smallest piece of your Crumb Cake basket. Put a Stampin' Dimensional on both sides of the small basket then attach the larger basket piece.
9. Cut 4 pieces of the Very Vanilla Bakers Twine about 2 inches long and attach to the back of the basket. Gather the twine together so they can be placed behind the hot air balloon to look like they are attached. Attach the hot air balloon using Stampin' Dimensionals, attach the basket to the card using Mini Glue Dots.
I hope you have just as much fun as I did playing with the Embossing Paste and creating this card.
Until next time, stay crafty :)
Delene